

Getting started with Virtual Machines (VMs) and VirtualBox
Scroll towards the end for a list of VMs to get started and resources to keep learning


This blog post is a guide to get you started with Virtual Machines and VirtualBox. Chances are you have an interest in cybersecurity, you're new in some way, and maybe you've even installed VirtualBox already but have no idea where to start. This guide is for you!
We'll go over the following topics in this guide:
- What are virtual machines?
- Machine Specifications for VirtualBox
- Installing VirtualBox
- Setting up virtual machines
- Turning off your virtual machine
- Where do I go from here?
What are virtual machines?
Throughout your cybersecurity journey, you'll find that Virtual Machines (VMs) will quickly become an essential learning tool.
Virtual Machines (VMs) are basically a "computer in your computer". Instead of having to gather many physical devices for experimentation, you can virtualize all of those devices on one physical machine and manage them through one interface. This interface is known as a hypervisor.
The VM is called the "guest", while your physical machine is called the "host".
VirtualBox is my hypervisor of choice. It's FREE and and works fine for personal use.
Machine Specifications for VirtualBox
Unfortunately, virtualization can be pretty power-hungry, especially if you want to run more than one VM at once (which I definitely recommend if you want to make the most out of your learning). You probably can't follow this guide comfortably on a toaster (if you can, I would love to know more about it!)
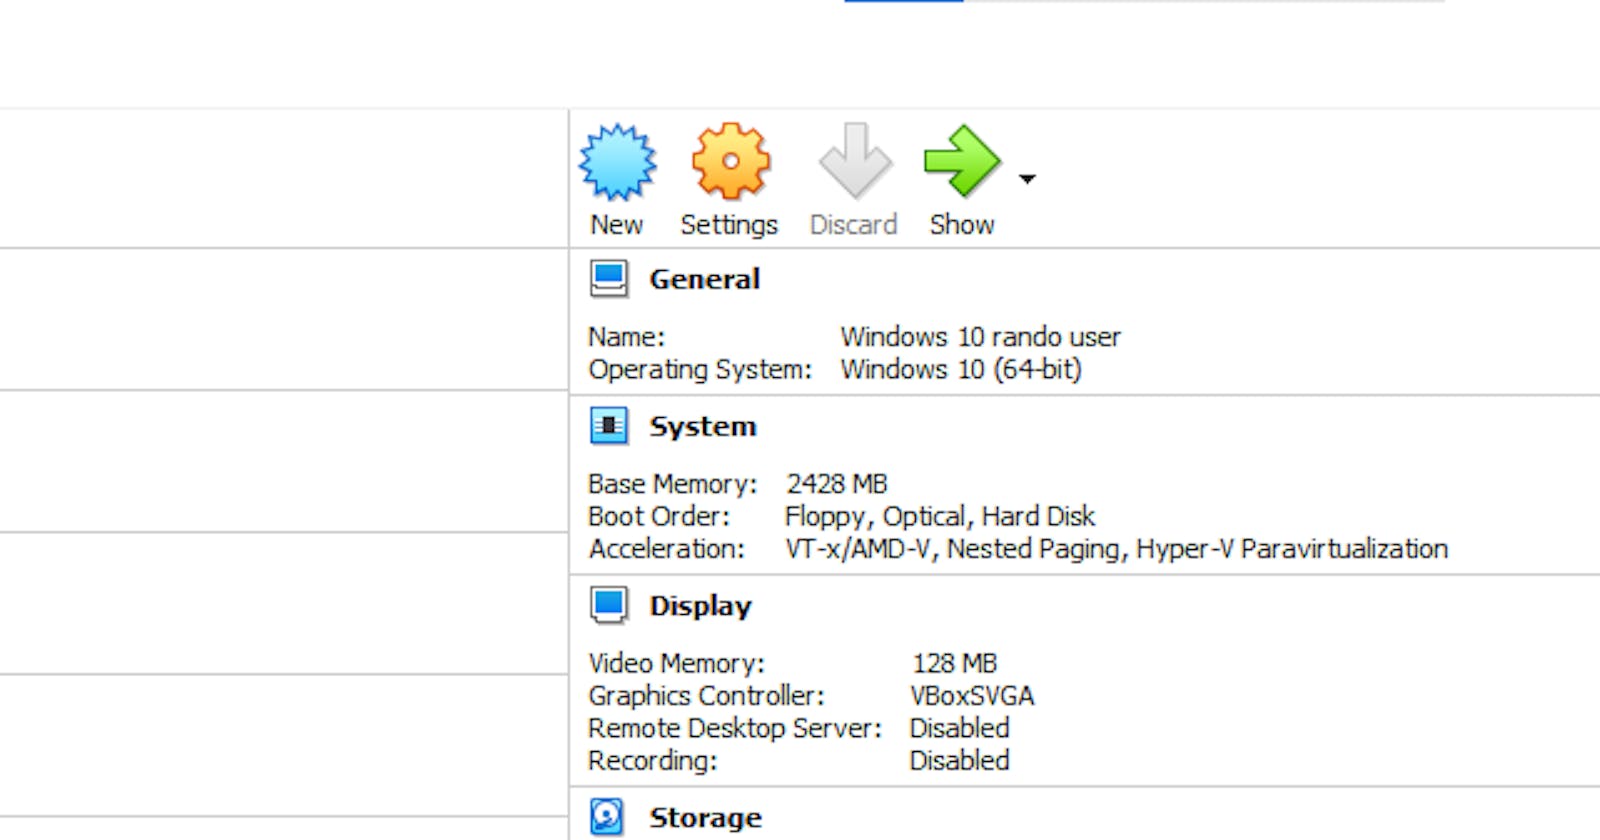
These are my desktop specs and I have no performance issues running multiple machines (usually 2 or 3) at once.
Operating System: Windows 10
CPU: AMD Ryzen 5 3600 6-Core Processor - 3.59 GHz
RAM: 16 GB
OS: Windows 10
VIDEO CARD: NVIDIA GeForce GTX 750 Ti
See the official VirtualBox Documentation for specification recommendations.
If you don't have a device that meets these specifications, there are cloud-based options out there - but they might require some tinkering.
Tinkering in a cloud-based machine before committing to buying more powerful hardware could be a more comfortable option for you.
PaperSpace is a great place to start when looking for cloud-based VMs.
Installing VirtualBox
Installing VirtualBox is simple. You can find the installer for your operating system on the VirtualBox downloads page.
WAIT! But before you install...
Before you install VirtualBox on your system, check that checksum!
A checksum is a unique string generated by doing some math on a file. If you generate a checksum on a file you downloaded, and that matches the checksum provided by the author - then you know that you have the EXACT same file and won't run into any issues.
Sometimes files can get corrupted in transit, and trying to use corrupted files can cause problems - especially when you're setting up virtual machines.
Read more about checksums here.
Here are some resources to help you check that checksum!
Back to the installation process
This guide assumes you're using a Windows system moving forward, but the overall instructions are about the same for MacOS and Linux-based systems.
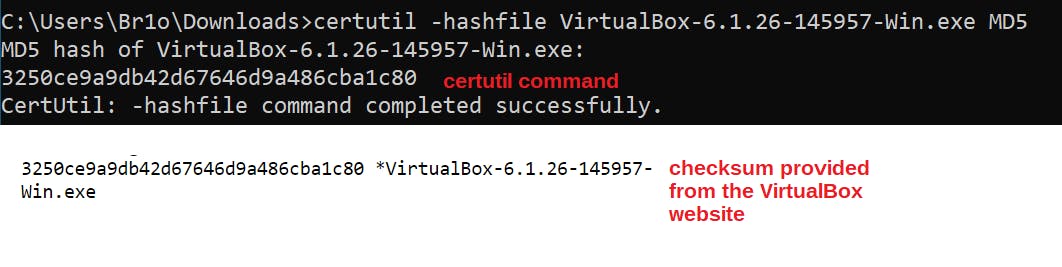
First, download the installer. Then, check the checksum of the downloaded file. Once you have verified the checksum matches the downloaded file, run the installer.
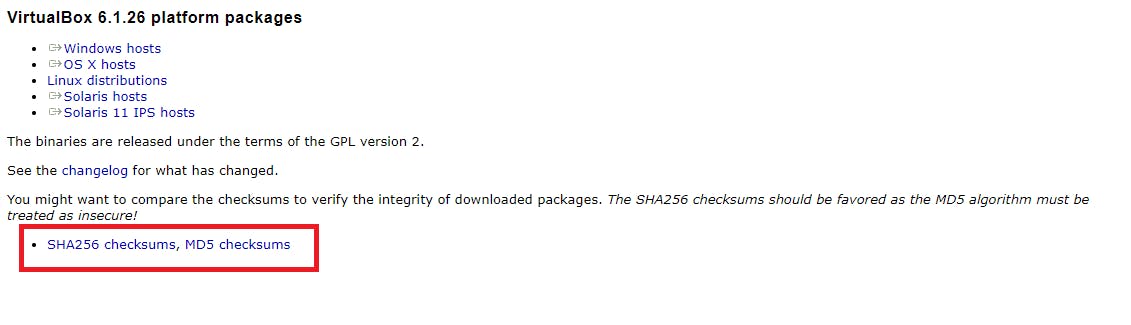
You can download the checksums from the VirtualBox downloads page. You may have to scroll down a bit to find them.
In this example, we see that the checksums match.
Once you run the installer, you can safely keep clicking "next" and keep the default options.
Setting up virtual machines
There are two ways you usually set up virtual machines.
You can either download the .iso file for the operating system you want to install on your virtual machine, or import a premade VM image.
Premade VM images are usually .ova files. I prefer to grab premade VM images when I can.
The setup for .iso files tends to take a bit longer, as you're installing an operating system on your virtual machine as you would if you were setting up a physical one.
Note about downloading files
It can take forever depending on your internet connection. Waiting for your downloads to complete is the worst part of trying to set up a VM.
Most of the time, you have the option of downloading a .ova or .iso file via a torrent.
Try BitTorrent if you're interested in downloading your files using a torrent. It tends to be much faster than using your standard download URL. If you decide to use BitTorrent, go slowly through the installation process to avoid installing unwanted "freeware" on your computer.
Importing a .ova file
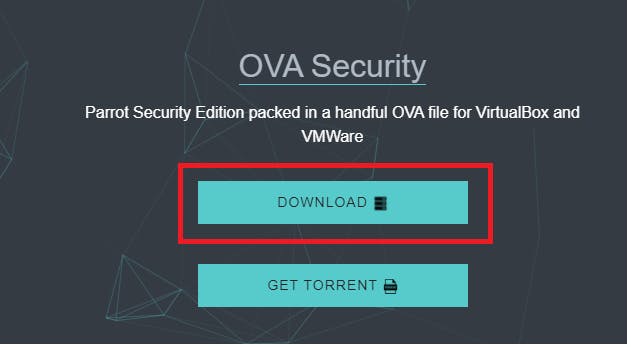
In this example, we'll be grabbing a .ova file for the Security Edition of ParrotOS from ParrotSec.
ParrotOS is a Linux-based distribution. The Security Edition comes with a plethora of tools pre-installed for penetration testing and general cybersecurity tinkering.
Download the "OVA Security" .ova file.
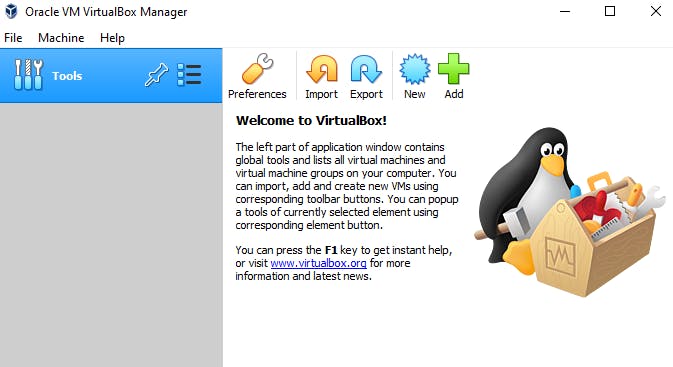
Open VirtualBox.
In the "Oracle VM VirtualBox Manager" window click "Tools". Then click the "Import" button.
In the "Import Virtual Appliance" window that appears click the "Import file" icon to the right.
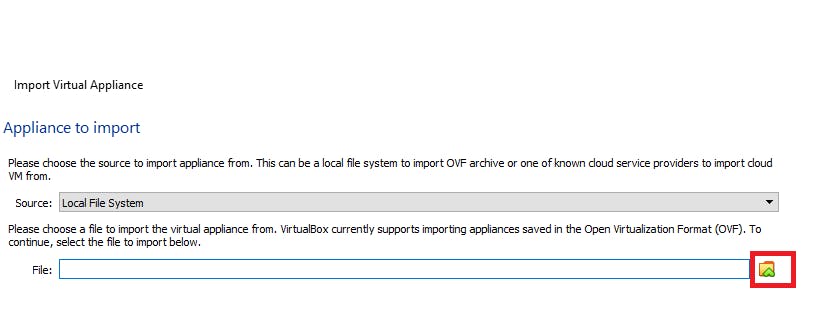
Select the .ova file you downloaded. Once you have select the file click "Next".

Change any settings as desired. Click "Import". Agree to any Software License Agreements that might appear.
To start the VM you just imported, click on the VM in the list on the left side of the Oracle VM VirtualBox Manager" window. Then click the "Start" button.

Installing a .iso file on a VM
In this example, we'll be installing Xubuntu, a spin-off of the popular Ubuntu distribution.
The process for installing .iso files in a VirtualBox VM is the same for any OS. The only reason we're using Xubuntu in the example as opposed to Ubuntu is because of the smaller file size.
Download the .iso file.
In the "Oracle VM VirtualBox Manager" window click "Tools". Then click the "Import" button.
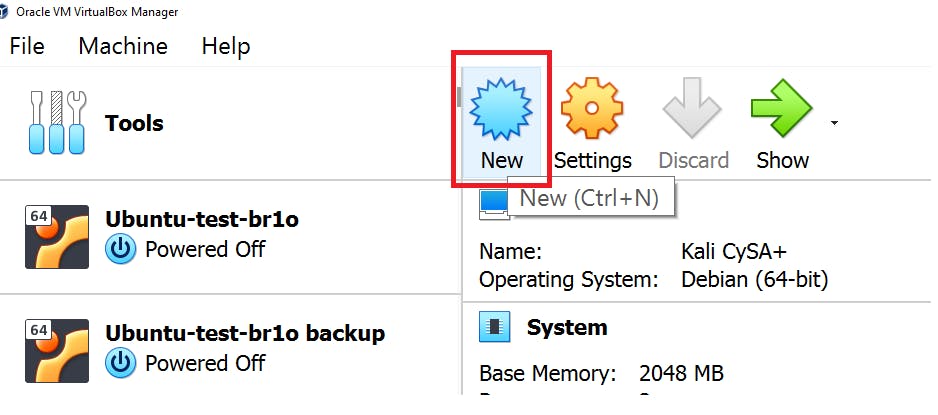
To install a .iso file and create a new VM, click the "New" button.
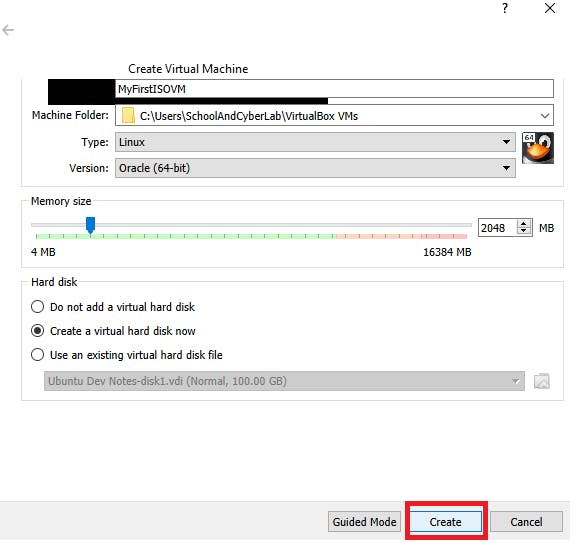
Fill out the name and OS of the Virtual Machine.
Set the RAM to the desired amount (I usually do 2048MB minimum for all my VMs).
Leave the "Create a virtual hard disk now" option checked. The "Virtual Hard Disk" is the amount of storage space allocated for your VM, just like an HDD or SSD in a physical machine.
Once you have verified that these are filled out, hit the "Create" button.
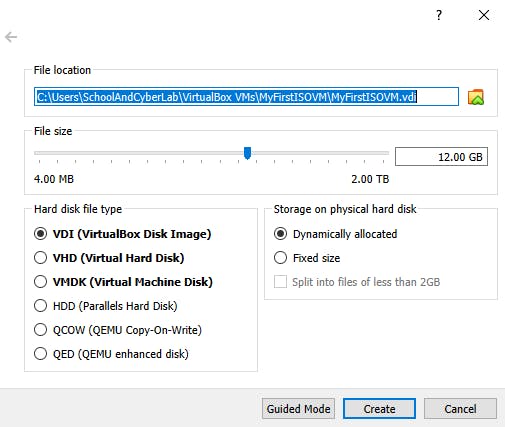
Modify the size of the virtual hard disk to your needs. Then click the "Create" button.
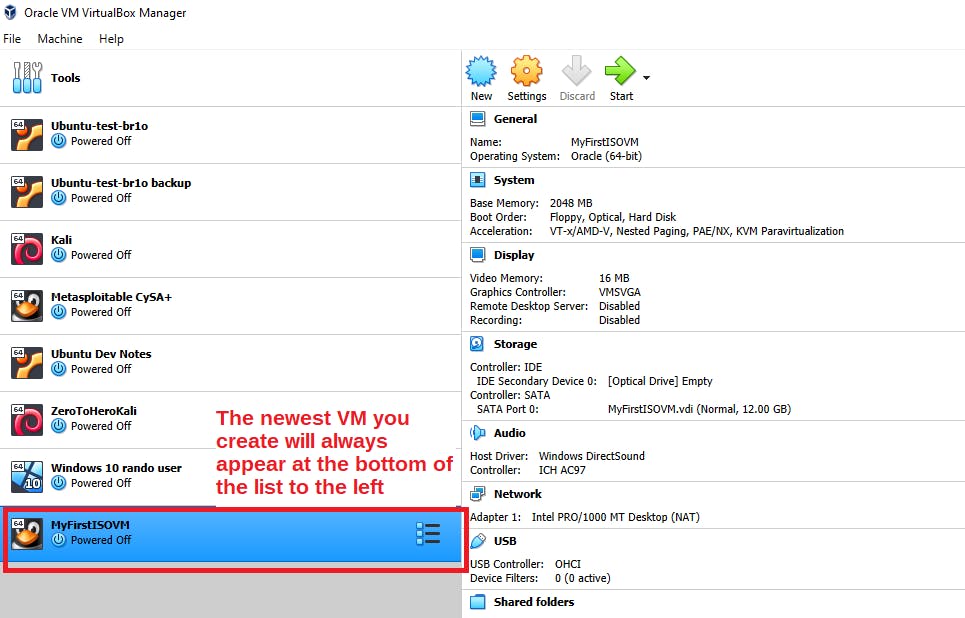
You will now have your new VM listed on the left side of the "Oracle VM VirtualBox Manager" window.
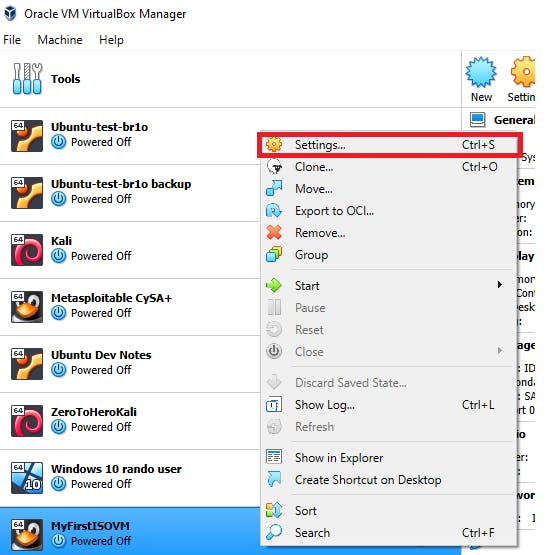
Right-click on the VM and click "Settings".
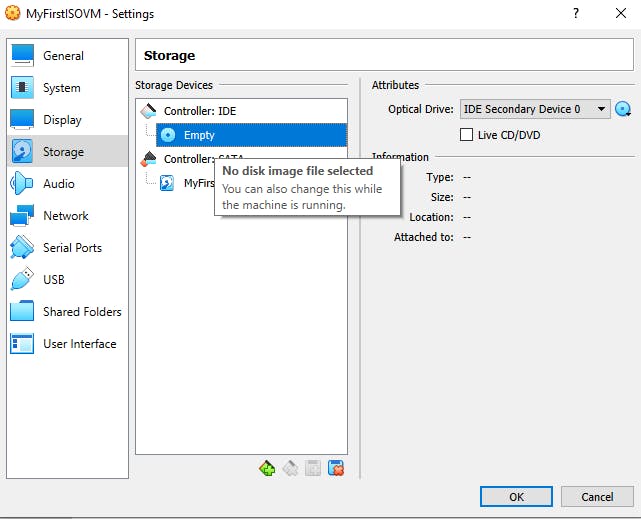
In the "Settings" window click "Storage" on the left.
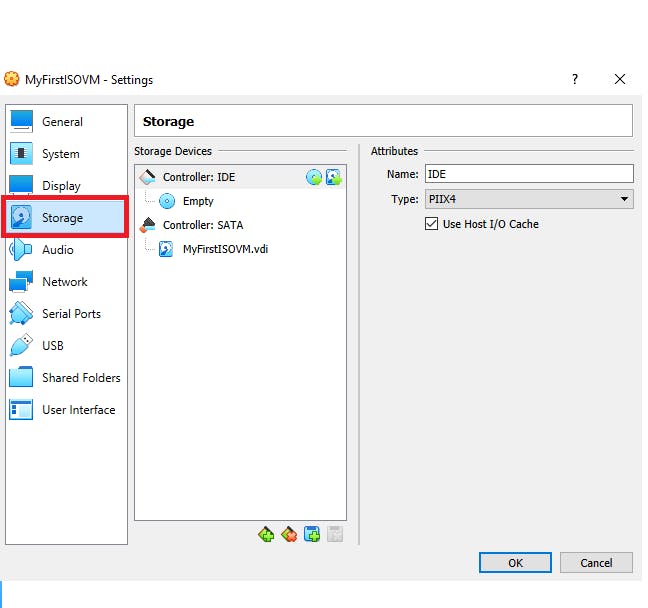
Under the "Controller: IDE" option note that there is a disc icon with the word "Empty" to its right. This indicates that we have not yet "inserted" our .iso file into our VM to begin installing our desired OS.
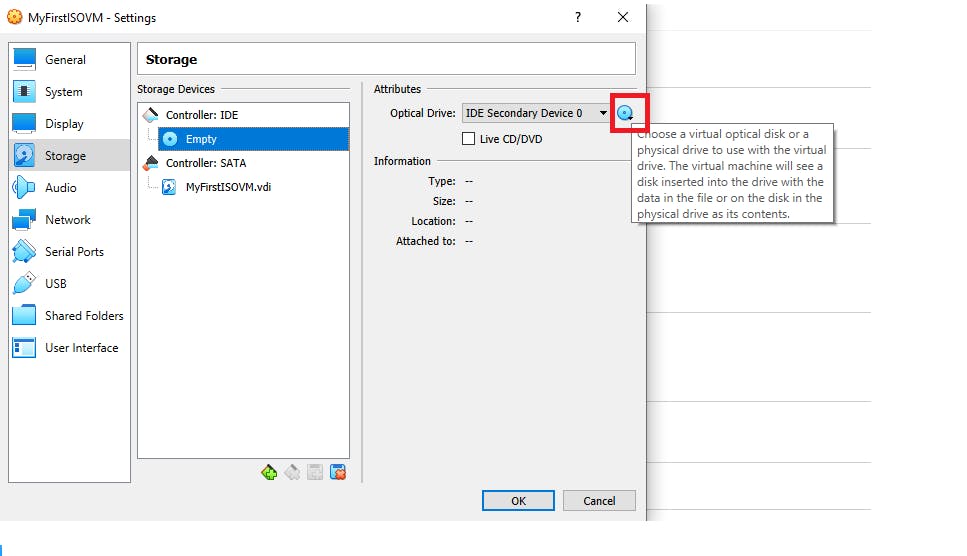
On the right side of the "Settings" window under "Attributes" click the disc icon. Then, click "Choose a disk file..."
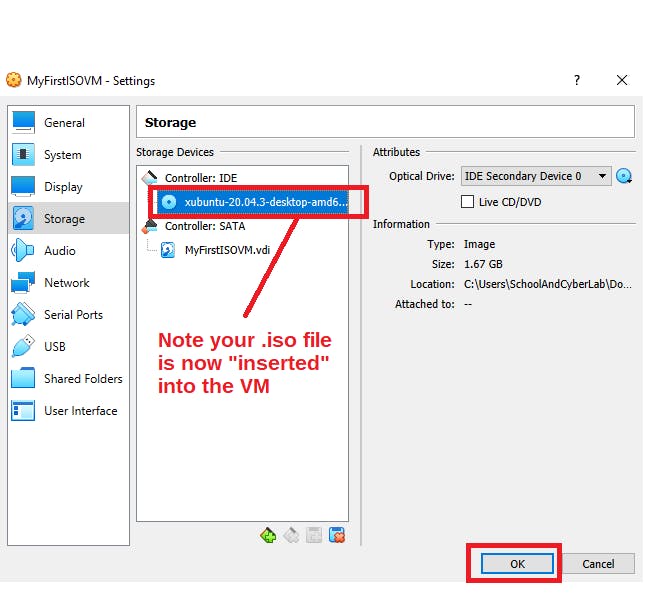
Select the .iso file you downloaded.

Once you select the .iso file, it is now "inserted" into the VMs optical drive. The word "Empty" next to the disc icon will change to the name of the .iso file you selected. Click "OK" to close out this window.
Click on the VM in the list on the left of the "Oracle VM VirtualBox Manager" window. The VM will have a blue background when selected. Click the "Start" button to start the VM.

The VM will now start. It will begin to install the OS contained within the .iso file, in this example, Xubuntu. Go through the prompts in the installation process. Once you have completed the installation process, you can start to use your VM.
Turning off your virtual machine
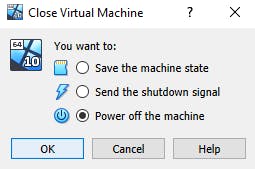
In the VM window go to "File" in the top left. Click "Close".
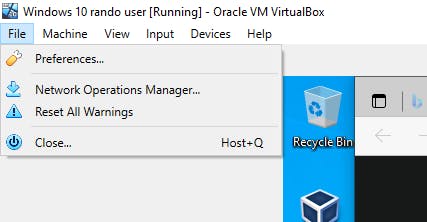
In the "Close Virtual Machine" window ensure the "Power off the machine" option is selected. Click "OK" to turn off the VM.
Troubleshooting Common Errors - My VM won't start!
You followed most of the steps above, but then when your VM doesn't start, what do you do?
See below for the most common error I have encountered when trying to set up VMs and how to troubleshoot.
Error: Implementation of the USB 2.0 Controller not found!
When you try to start your VM, you can get an error window that looks like this:
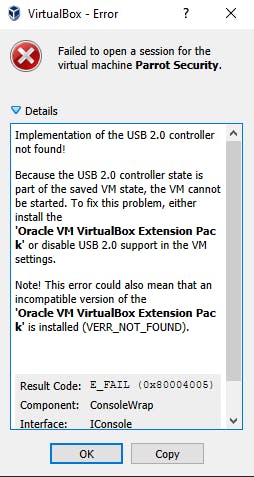
Click "OK" to close the error window.
Right click on the VM and go to "Settings".
In the "Settings" menu click on "USB" on the left side. Select the "USB 1.1 (OHCI) Controller" option. Click "OK" to close the window.
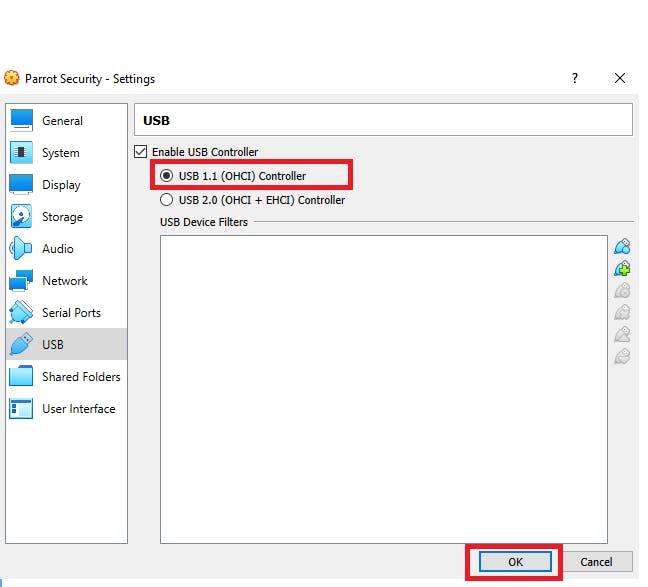
Now your VM should start.
Where do I go from here?
Start tinkering!
Start tinkering with different OSes and pre-made VMs. Here is a list to get you started.
Learn more about using VirtualBox
The VirtualBox Manager is the official, comprehensive guide to using VirtualBox and all the features it has to offer.
One of the first things I recommend you do is install Guest Additions in your VMs. Guest Additions allows for clipboard sharing between your host and guest machines, as well as other quality-of-life features.
To get your VMs to talk to each other, refer to the Virtual Networking section in the official manual. (I plan on writing about getting started with networking in VirtualBox as well, but don't wait for me - just start learning!).
Thanks for reading!
Br1o